Helly Hansen Winter Duel

Six and a half years ago, Warriorwoman and I had a challenge within a challenge (sorry about the broken links to the pics). Salomon had asked us both to undertake personal running challenges and so we decided to make things more interesting by seeing who could complete their challenge first. My challenge was to run 100 miles in a month. I know that’s not many for some of you, but it was a lot to me then and I still haven’t run over 100 miles in a month since. Warriorwoman’s challenge was, I think, to run past each station on the Circle Line (this was when it was still a circle. Well, a loop, anyway).

I am far too much of a laydee and noble sportswoman to say who won that particular challenge (clue: IT WAS MEEEEEEEEEEEEEE) but now we’re having a rematch in the form of the Helly Hansen Winter Duel.

Participants in the duel download the app, sign up and the app will set you up with a duelling partner matched to the level of running you’re currently doing or you can choose a partner. I signed in with my Facebook account and there was Warriorwoman’s little face peeking out of my screen and as I think we’re probably on equal terms when it comes to fitness, laziness and can-I-be-arsed-to-go-out-for-a-run-ness, I challenged her to a duel, which she accepted.

We started off really well, as you can see.

Helly Hansen Winter Duel

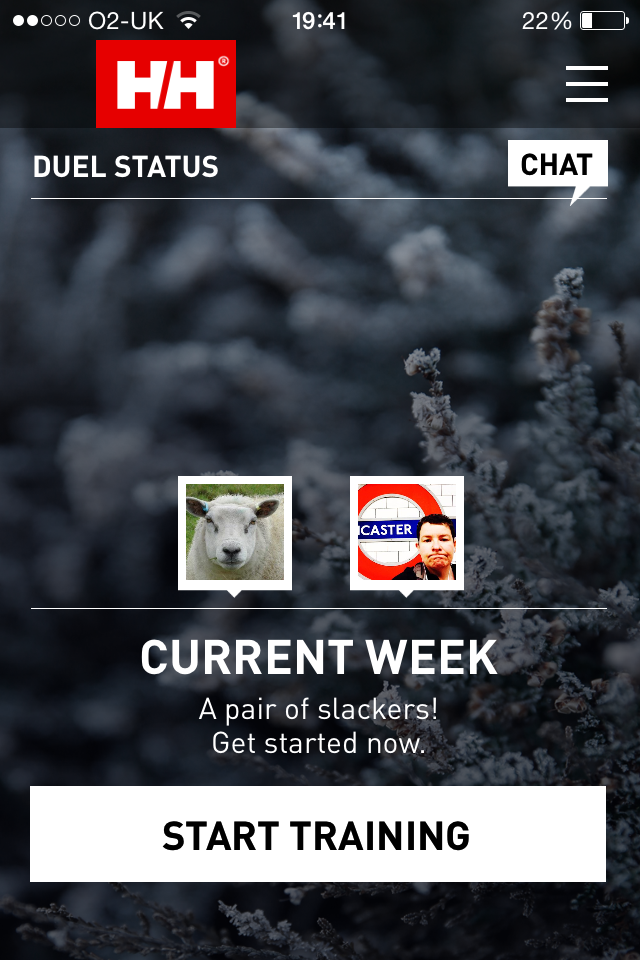
Slacker? Who, me? As if.

The challenge lasts for five weeks and at the end of the five weeks, the participants with the highest number of miles recorded will get the chance to duel face-to-face at a Helly Hansen training event.

It’s simple to log your miles. You just click that big button you can see in the photo above that says START TRAINING and the app records your time and distance (as far as I can see, it’s purely a stopwatch and map, so I could, in theory, cheat and cycle thirty miles but that would be cheating and cheating is bad and Warriorwoman would never believe I ran thirty miles in one go anyway). When you finish your run, press stop and it shows you how far ahead or behind your partner you are in that current week.

Helly Hansen  Winter Duel

I hope sheep aren’t afraid of heights

As we’ve both got half-marathons coming up, I reckon this challenge will give us the motivation to actually do a bit of training. It certainly gave me more incentive to get out for the six miles I should have done on Saturday.

For more information, watch the video below, or visit the Helly Hansen website.

The JogBlog Guide To Cycling Safely In Winter

Cycling Safety

I’m a raver. Aciiiiiiiiid.

Ideally, you should leave your bike(s) safely locked up in the garage until the summer, as cycling in the winter is absolutely minging but, if you’re like me and live far far away from the train station or somewhere else you need to get to and you don’t drive, you’re going to have to get on your bike. However, there are a few things you can do to make your journey slightly more a) comfortable and; b) safe, and I list these, in no particular order, below.

  1. Lights. The absolute most important thing. I’m being serious here (yes, honestly). I see so many cyclists riding without lights and they’re fucking idiots and they really annoy me and if they get splattered by a car or go to prison for knocking over a pedestrian who didn’t see them on their lumps of metal then they deserve all they get. Lights don’t even have to be expensive – I’ve got my main lights on my mountain bike that I use most of the time to get me around but I’ve also got some of these cheapy cheapy lights (at the time of writing, they’re £1.43 including delivery – how cheapy cheapy can you get?) that work perfectly well and are small enough to carry around if I’m out on one of my bikes that don’t have lights and it’s a possibility I’ll be coming home in the dark.If you don’t have lights, you’re a dooby dooby nutjob.
  2. Hi-vis jacket. Yes, there’s a possibility you’ll be mistaken for a builder but hey ho, it’s all about being seen and keeping safe – it’s not a fashion contest. If you really don’t want to wear hi-vis (but you get used to looking like a builder, honest), you could get one of the Karrimor Reflekt jackets I blogged about the other day. They look like a normal jacket until light shines upon them, then they light up like a simile for things that light up that I can’t think of right now.
  3. Hi-vis rucksack cover. If you don’t want to wear any kind of hi-vis/lighty-up jacket, then hi-vis rucksack covers are available. You’re not so vain you wouldn’t put hi-vis on your rucksack, are you? As well as making you more visible to motorists, it’ll also keep your rucksack dry. Win-win, as saddos say.
  4. Wrap up warm. I’m still seeing some people in town wearing shorts and flip-flops but they’re hard and probably from Newcastle or something but if you’re not a) hard; or b) from Newcastle, you’re going to need to keep your bits warm while you’re on your bike. No, you mucky-minded lot, I’m talking about other bits that stick out like your fingers and your nose. Wear gloves and either a scarf or a buff that you can pull up over your nose and chin. Although, if you’re like me, you can only breathe through a buff for about three seconds before you suffocate and have to pull it down and get cold again. But, buffs are cool and keep your neck warm and they come in all different patterns and can be worn in lots of different ways.
  5. A toolkit. I bought a toolkit from Amazon for about £11 including delivery. It’s great. It attaches to your bike, so there’s no chance of you forgetting to take it out with you and contains levers, a pump, a puncture kit and other things I don’t know how to use.
  6. A carrier bag. Yes, a carrier bag. Take a carrier bag out with you and tie it over your bike to keep the seat wet in case it rains while you’re away from it.
  7. Learn how to fix a chain. Okay, so I don’t know how to use the toolkit or how to change a puncture (I’ve been relying on the ‘someone else will do it for me’ method, but luckily I haven’t – touch wood – had a puncture yet, but I have fallen off in the ice and the snow when I came to a sliding halt at a crossing (damn you, person in wheelchair; next time I’ll make you wait until I’ve gone past before you can cross the road) and my chain came off. I didn’t fancy wheeling it home two miles in the snow so I phoned Shaun and said, ‘Heeeeeeeeeeeeeeeeeeeeeeeeeeelp, my chain’s come off, waaaaaaaaaaaaaaaaaaa’ and he said something about putting the bike in third gear and turning the wheel, which worked and I cycled merrily home instead of trudging along at 2 miles an hour in the sludge.
  8. Ass savers. No, I’m not talking about the carrier bag again but someone on my cycling group’s Facebook page brought to our attention Ass Savers mudguards. These are great. They don’t need tools, come in lots of different colours and will save you from getting rain and mud up your back. You can get them on eBay for about £5.
  9. Money/charged phone. Bit obvious really, but make sure you have a charged phone with you so you can call for help if you need to, and money for a taxi/train/bus/cup of tea while you wait for someone to fix your puncture.
  10. Don’t cycle drunk. You might not have a friendly policeman willing to lock your bike up for you and give you a lift home after seeing you unsuccessfully try to ride your bike in a straight line. No, of course this isn’t a true story. (Okay, it’s totally a true story. Wasn’t in London though, obviously.)

If you’d like some more cycling safety tips, there’s a pretty infographic here, but these are my JogBlog Guide To Cycling Safely In Winter ones.

Any tips you’d like to add?

Be Seen and Be Safe In The Karrimor Running Reflekt Range

Guess who stuck diligently to the first week of their half marathon training schedule last week? Yep, you got it – not me. I wasn’t a complete slacker though, as I did join my running group on Tuesday evening for their speedwork session, which involved running past the Outlet Centre’s food court approximately twenty-three times and I can tell you, the smell of chips frying didn’t get any less tempting the more times I ran past it. But at least I was only running past it and not through it, like the Ironman participants had to do in the summer, only to be rewarded for their efforts with a plastic cup of water and an energy gel when they ran – drooling and starving like an extra from The Walking Dead – through the exit.

I should probably admit, I only went to the session because, in an act fuelled foolishly not by wine for once, but by coming home energised and motivated after my local parkrun the Saturday before, I posted on Emily’s – our running group leader – Facebook page that I would be coming along on Tuesday and posting it publicly on her page so I couldn’t get out of it. She even offered me a lift, so there was definitely no getting out of it and now she says now she knows where I live, there will definitely be no slacking off in the future.

As it was an evening run, it gave me the chance to try out the new Karrimor Running Reflekt range I’d been sent. As you’ve probably guessed from the name, it’s made with reflective material. On one of the billion tags that were attached to the jacket and tights, it said to take a photo with the flash to see the transformation. So I did. Here’s the jacket.

Karrimor Running Reflekt Jacket

Photo taken with flash

Karrimor Running Reflekt Jacket

Photo taken without flash

And here are the tights and jacket together, in a runner’s equivalent of double denim.

Karrimor Running Reflekt Tights

Photo taken with flash

Karrimor Running Reflekt Tights

Photo taken without flash

As you can see, these clothes really are reflective. When you’re outside and not taking photos of yourself in the mirror while being ignored by your cat, you can’t tell they’re reflective by looking down at them but my running group were impressed by how reflective they were and wanted to know where they could get some.

It’s not all about the reflectiveness though – this is decent kit. I’m really fussy about my running tights as ones that don’t stay up or are uncomfortable really get on my wick(ing fabric – ha!) These tights are great. They’re thick, long enough (they’re almost too long and I usually have the opposite problem and can’t get tights/trousers/leggings long enough), have zips on each ankle/calf, have a zipped pocket on the back and – most importantly for me – they stay in place and there’s no running along pulling your tights back up while simultaneously hoping you’re not giving yourself a wedgie in full view of any passing dog walkers. You’ve probably noticed they have a pink pattern on the ankles and this is going to annoy the pink haterz, but I like it.

I don’t usually wear a jacket while running as I get too hot, but as it was raining, I thought it might be a good idea and although it fit well and was comfy enough, I did get too hot but if you like running in jackets and want one that will help you not get run over, this is the jacket for you. Karrimor also do a reflective long-sleeved running top but I didn’t get sent one of those to try, boo.

The Karrimor Reflekt running tights are a bargainous £19.99 (honestly, they’re well worth this – I want to get some more as I haven’t got any other decent long running tights) and the jacket is £59.99. The range is available in men’s and women’s (unsurprisingly the men’s tights don’t have pink bits) from the Karrimor website.

Oh yeah, I ran five miles this morning to make up for the five miles I didn’t run on Saturday. I’m not sure how well I’m going to be sticking to my schedule the rest of the week as I’ve been invited to afternoon tea at the Houses of Parliament tomorrow for a running thing (just thought I’d sneak that in there) and I’m out all day on Thursday.

Just getting my excuses in early.

Infographic: Common Running Injuries

Like most beginners, when I first started running, I suffered from a few injuries. Thankfully, I haven’t had anything serious since then, only a few niggles now and again. Okay, so that’s probably because I ran a lot more in the early days but that’s not the point.

If you’re prone to injuries, you’ll be interested in this infographic, featuring some of the most common running injuries, along with tips on how to avoid injuries and some home treatments.Common Running InjuriesInfographic supplied by Cute Injury – Personal Injury Specialists


The Accidental Queen

I wanted to go to parkrun this morning but, alas, I got up too late. Only slightly too late and I could have made it if I’d got into my running gear immediately and cycled down to the park without having a cup of tea first, but I’m not much of a get-up-and-get-out-the-door kind of girl, so I dossed about for a bit, then went out for a run by myself round a few local quiet country lanes.

As is usual for round here, I didn’t see many people. I saw a woman and her dog twice and as I got onto the trail that leads back to my road, the dodgiest looking man I’ve ever seen was walking towards me. He was wearing a t-shirt, shorts and trainers but he wasn’t running (obviously only people who are running are allowed to be wearing t-shirts, shorts and trainers) and didn’t look like he had been or was going to be running (obviously all runners look like runners) and he was walking along the path with his fists clenched and his head down. As I went past him, I saw fury on his face and wondered if he always looked like he was in a bad mood or had he just had an argument with his girlfriend or something? But, anyway, he didn’t murder me (obviously) and I carried on running, only looking over my shoulder about twenty-three times to make sure Mr Bad Mood Face hadn’t decided to follow me.

crown

When I got home, I did my usual uploading to SportTracks and Strava thing and was pleased to see I’d won a crown on Strava. YAY! I am currently top woman on the leaderboard for a local segment and fourth overall. Okay, so I’m the only woman on that segment and fourth out of four but that’s not the point. I got a crown. I’m the Queen and you all must curtsey. Ha.

Giveaway: Upbeat High Protein Dairy Drink

Upbeat is a new high protein, low fat dairy drink. It’s made with real fruit, has less than half the sugar of leading smoothies and fruit juices, contains no artificial colours or flavours and is available in three flavours – mango & passionfruit, strawberry, and blueberry & raspberry.

I’d like to be able to tell you what it’s like but, although I did get a couple of bottles from Tesco, I didn’t get round to drinking them before the use by date. So, instead of wasting the three vouchers I have left, I’m going to give them away (with the added bonus of it counting as one of my Be Kind For A Month things).

upbeat-protein-drink

If you’d like to be in with a chance of winning one of the three vouchers, just leave a comment below and I’ll pick three winners after the closing date of Friday 31 October. UK entries only please (unless you want to pay for the postage but that probably wouldn’t be worth it as a) it’d cost more than the drink is worth; and b) you can probably only get Upbeat in the UK anyway).

Review: New Balance Minimus Trail V2

It’s been a long time since I went for a run – six weeks and three days, to be precise. That was when I went to my local parkrun and actually ran the whole five k without stopping. Yay me. Although, even though I ran it without stopping to walk, it was still slower than when I’ve run/walked it but I was so pleased I hadn’t walked any of it, it motivated me to start running regularly again. Well, that motivation didn’t last long, did it?

Still, I went for a run on Tuesday to try out my new New Balance Minimus Trail shoes I’d been sent.

new-balance-minimus-trail-v2


They’re not the prettiest shoes on the planet (unless you like plain shoes, then they’ll be right up your street (or should that be trail?)) but they do have a gorgeous pinky/orange spiky sole; it’s a shame they’re going to be covered with mud. Given my opinion on shoes centres mostly around what colour they are, if you want the technical bit, here’s what New Balance have to say about them:

”With a 0mm drop, the Zero Trail V2 allows you to feel the path beneath your feet and when combined with an aggressive outsole, the result is a durable trail shoe which allows you to connect with the path feeling confident and secure with every step.

An innovative REVlite midsole provides premium responsiveness and durability at a 30% lighter weight than other foams with comparable performance. The REVlite is consistent with the old school design elements of the Zero Trail v2 but is combined with a super aggressive 7mm lug outsole, giving maximum traction for off road activities and putting more between your foot and the ground.

The sticky rubber outsole is durable and tacky creating greater traction on slick surfaces, perfect for running on those dewy mornings or scrambling over wet rocks. Added toe protection and heel support provide extra protection for those ragged runs!”

I went off to do a bit of the Greensand Way and it didn’t take long to get covered in mud. I didn’t slip over, so the spiky soles must have been doing their job properly. They don’t feel like trail shoes when they’re on – trail shoes I’ve had in the past have felt heavy and solid but these are light and comfy. The tread is so deep on them though, I’m going to need a hoof pick to dig the mud out.

If you’re after some light trail shoes, and like your shoes to be almost as plain as a Rich Tea biscuit (but with a pretty sole), I can recommend the New Balance Minimus Trail V2.

Review: Promixx Vortex Mixer

It’s not very often I have a protein shake but when I do, unless I mix them in my blender, they’re full of powdery lumps. The last one I tried, I shook up in one of those custom-made shaker things that are supposed to prevent any lumpage but it obviously lied as it was as lumpy as the rice pudding you got at primary school. In other words, bleurgh. Okay, that was only one word but you know what I mean.

So, what do we need to help us through this lumpy protein shake world? Yes – a gadget, of course. We always need more gadgets in our lives, that goes without saying.

promixx-vortex-mixer

The Promixx Vortex Mixer is a hand-held vortex drinks mixer, perfect for protein shakes and sports drinks, etc. It also says on the box it can be used for cocktails, juices, instant soup, eggs, milkshakes and baby formula. The mention of instant soup intrigued me but I can’t see anywhere on the website or in the instructions if that means you can pour boiling water into it and whizz up your cream of asparagus. In fact, I would prefer the instructions to be more detailed as there’s no mention of what you can and can’t put in it but as it’s designed for liquids, you’ll just have to use your common sense and not try to liquidise a pizza in it.

After taking the Promixx out of the box, the first thing I noticed after thinking how pretty it is (other, less girly colours of black and white are available) was the blade, which appeared plastic and flimsy. My choice of Barbie-pink probably didn’t help in this respect. (Is it just me, or does the blade look like someone standing on their head?)

promixx-plastic-blade

Still, it only had to mix up some liquid but to be honest, I wasn’t holding out much hope that it was going to do a decent job, especially as I was going to make a milkshake using Choc Shot, which is thick and gloopy.

choc-shot-milkshake

The instructions advise you to fill the Promixx with your liquid of choice (my liquid of choice being some soya milk), then switch the Promixx on. I thought it was going to splatter everywhere but it stayed safely in the tumbler, doing it vortexing thing. While the liquid’s spinning around, you then add whatever it is you want to add to the liquid.

promixx-vortex

Here’s a video of it doing it’s vortexing thing.

And as you can see, it’s done a great job at mixing all the Choc Shot into the milk. There was only a tiny couple of lumps left, which probably would have been mixed up, had I left the Promixx running for a few more seconds.

choc-shot-lumps

Cleaning the Promixx couldn’t be simpler. Simply fill it with water and a little detergent, switch it back on, and it’ll clean itself. Yes, I said it’ll clean itself. As you can see in the video, it’s picked up the two little lumps that were left.

A bit of a rinse and as you can see, it’s sparkly clean. Cool.

promixx-vortex-mixer-clean

I’ve got to say, although I think the Promixx is brilliant, it’s not cheap at £18.89 on Amazon, at the time of writing this review, especially as it doesn’t even come with the batteries (2 x AAA) included. Although, if you do use a lot of sports drinks and protein shakes, you will get a lot of use out of it and you will also absolutely love it. It comes supplied with a lid which is 100% guaranteed leakproof, so it’s also perfect for taking out and about with you.

promixx-vortex-mixer-upgrade-pack

If you don’t want to mess around with batteries, an upgrade pack will soon be available, containing a rechargeable motor with USB charging cable, a fully integrated NUTRiPOD supplement storage container and a spare Promixx leak proof sports cap.

For more information, visit the Promixx website.

Review: Slendertone Abs Women

You’ll all have seen those adverts where there’s a woman with super-firm abs, lying provocatively on a sofa, munching away on a packet of cheese and onion, while wearing a belt that’s doing all the exercise for her. You’ll also, no doubt, have been as sceptical as me and thought, ‘Yeah. As if’.

So, when Slendertone asked me if I wanted to try their Slendertone Abs Belt Women (okay, own up – who told them I didn’t already have super-firm abs, huh?), I was sceptical but Shaun said the belts do actually do something because of, um, something scientific that I can’t remember now.

slendertone-abs-box

I’d put off trying the belt for a while as, when I first received it, I had shingles and had prescribed myself a cure of sitting in the sunshine, reading books and drinking freshly squeezed juice but most definitely not strapping things onto my body that were going to stimulate my already ravaged and over-stimulated nerve-endings. Also, on the press release I’d been sent were a load of floor exercises and I dislike floor exercises even more than I disliked having shingles. Still, when I eventually opened the box (which also includes a charger and quick start guide – not pictured above) and read the instructions, I saw there’s a choice of passive (e.g. sitting down eating crisps) or active (i.e. doing stuff) programmes. The passive programmes start at 1 for initiation, through to 7 for strength, with the active programmes being from 8-10 which you can do with the crunch exercises included in the instruction manual.

The first time you turn on the display unit, it starts at programme 1 and automatically progresses through each programme each time you turn on the unit.

slendertone-abs-display

So, this morning, I decided to do the first programme and sat with it on for 20 minutes while I went through my morning routine of checking my email and Facebook. I thought it would feel really odd but it doesn’t – it’s a warm tingly feeling which pulses and comes in waves. You control the intensity yourself via the unit and the instructions say you should try to increase the intensity to level 15 or higher in the first session (the range is between 0-150). Because I am so hardcore and because it didn’t feel uncomfortable at all, I increased the intensity to 50 on each side (you increase the intensity for each side individually – I have no idea why).

The unit counts down the minutes and seconds and bleeps at the end of the programme. The instruction manual suggests you do a 30 day plan, with 5 sessions a week and they’ve included a diary at the back you can fill in each day with the intensity you reached on each side.

slendertone-abs-diary

I have no idea why I filled my first day in on the opposite side of the page. I swear I had the belt on my abs, not my head.

When you’ve finished that day’s programme, the belt fits neatly into the provided bag.

slendertone-abs-bag

According to the blurb, 100% of users report firmer, more toned abs. It also claims to deliver an average of 1.4 inch waist reduction due to toning of muscles. I had a hunt around yesterday for reviews and found a forum where twenty users had been asked to trial the Slendertone belt and report back after four weeks. I didn’t read every single post but the first few I skimmed through all reported they felt firmer, had lost inches and were getting into clothes they previously couldn’t.

jessica-ennis

I measured my waist this morning and will use the belt for 5 days a week over the next 30 days and will report back on my progress. Obviously, I’m not going to be sitting around eating crisps while wearing the belt and hoping at the end of the 30 days I’m going to have abs like Jessica Ennis so I’ll still be doing my usual exercise routine and I may even do a few crunches, too. Then I’ll have abs like Jessica Ennis. Or maybe not.

So, what did I like about it? It’s comfortable to wear, easy to use and the display unit slips into a pocket on the belt so you can walk around with it or do some moderate cardio exercise. It comes with a detailed 20 page instruction manual which has a long list of dos and don’ts including, don’t use while cycling, don’t wear with a belly button ring, don’t use on heavy period days, don’t use if you have cancer.

As for dislikes; as I haven’t used it for long enough to see if it makes a difference or not, the only criticism I have at the moment is it advises the pads are replaced every 20-30 uses which, at £11.99 for the replacements makes the belt – which retails for £149.99 – quite an expensive piece of kit if you’re going to use it regularly.

I will report back in four weeks and let you know of my progress. Super-firm abs, here I come!


1 10 11 12 13 14 118